Rebinding a Moleskine Notebook
With rare exceptions, I do all of my sketching these days in a Pocket Size Moleskine (outdated planner) notebook rebound with my own paper. I have created quite a few of these journal sketchbooks and have honed my binding technique along the way. There has been lot of interest in how I do this project/moleskine hack, and so I have written up the instructions for “Moleskine Reloaded”.
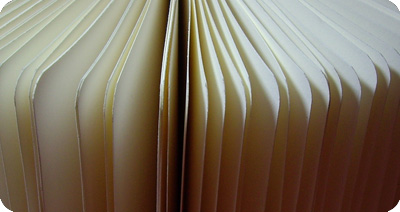
The bookblock is sewn together with a form of Coptic binding, which opens flat and complements the Moleskine very well. This binding method can also be used to produce books with exposed spines, as the stitching is plenty durable and quite attractive. I hope that these instructions are useful, and perhaps inspire some ideas for related projects.
Related Topics: Bookbinding, Projects
Leave a Comment
![]()
![]()
![]() Comments:
Comments: ![]()


July 20th, 2017 at 9:14 pm
Hi Dan,
sorry I am posting many years later, but I wanted to respond to your post anyway. I found a great selection of Moleskine outdated planners on amazon. Just searched for planner, 2015 and I picked up a couple great options for around 3.45 each. I hope this helps.
January 1st, 2010 at 6:52 am
Trumpetvine,
Thanks for this great tutorial. As others have commented – very well done!
I’m curious if you (or others) have found any sources for “dated” or “old” moeskine planners as you mention. A year ago,, when I was looking into doing this I found some through googling but I don’t see the same source for old molekskines. Thanks in advance for any ideas!
Dan
October 5th, 2008 at 1:31 am
hi there, just finished my 4th “handmade” watercolour notebook based on your bookbinding instructions. *thanks!*
April 13th, 2007 at 9:16 am
Thank you for sharing your wonderful instructions. I have just completed both the smaller version and another larger one. I used the Fabriano watercolor paper plus a few sheets of Canson Mi-tientes and some petal paper, and deckled the edges. Love the look. This was my first book-binding project and I found your instructions to be very easy to follow. On previously purchased journals I had always tried to add a few beads to the outside binding, something which reflected the spirit of each particular journal at that time. This was especially easy to do while the cover had not yet received the signatures. The larger journal has been graced with 2 old necklace pendants: one, an ivory rose (my mothers favority flower-she passed away one month ago) and secondly, a butterfly with small diamond given by my husband (a symbol of resurrection). These each hang freely from the outside binding of the Moleskine as I simply punched a hole through the binding, ran my needle from the inside to the outside, caught the ring holding the pendant and brought the neele back though the same hole, attaching the thread on the inside. It adds a nice personal touch and a way to use old pieces which I no longer wear.
Thank you ever so much again. I hope to continue making my own journals.
February 8th, 2007 at 8:14 am
I think that this could well be the perfect sketchbook – BUT – I’d feel so bad gutting an expensive sketchbook and I know that I don’t have the time to bind stuff myself. I think what I really would like is for moleskine to read this and make sketchbooks like yours!
January 29th, 2007 at 6:59 pm
congrats on the mention on Danny Gregory’s blog! You have good karma for sharing your bookbinding and art with the world.
January 25th, 2007 at 7:38 am
I was inspired to revisit Coptic bindings. I liked your treatment of the first two sections to create what would have been the boards. I didn’t have a Moleskine but made a paper wrapper with rounded corners. I used Mexican bark paper collaged and strenghthened with antique book papers and Fusion 4000 and watercolor and printmaking papers for the text block. I can hardly wait to fill it so I can make another one. Thanks for the boost.
January 23rd, 2007 at 12:43 pm
Well, I read your instructions and was struck with awe. I will probably never get around to that project, but I like the idea of a tiny moleskin and the 90 lb. paper.
January 19th, 2007 at 6:53 am
Wow, wonderful post, what an impressive detailing of the process! I couldn’t ask for more. Now if only scientific experiments were this thoroughly compiled…
I must come back and try this someday!
January 18th, 2007 at 3:43 pm
Thank you all!
Regarding an alternate cover, there are many possibilities (check out bookbinding sites and books).
However, the Coptic binding is nice looking and strong enough that a spine covering isn’t necessary. Thus there is one simple way to go:
Create 2 pieces (front and back) of cardboard, thick paper, metal, leather, or wood slightly bigger than your bookblock. You can paint, collage, etc. these covers to decorate them. Then, simply glue the cover pieces onto the front and back of your bookblock. The spine will be completely exposed and should look quite nice. You can even use colored thread to bind your book to better show off the Coptic stitching.
January 17th, 2007 at 10:32 am
Now that’s alot of work but well worth it to have a customized moleskin.
January 16th, 2007 at 5:37 pm
I am sooo glad you shared these directions!! Can you point me to directions somewhere to make my own cover instead of using the moleskin cover? I can’t wait to get my Fabriano paper to get started.
Thanks again, Janet
January 15th, 2007 at 1:09 pm
Your journals are so lovely…i saw some pics on Flickr…i am in awe!
January 15th, 2007 at 9:54 am
Just wanted to say how much I enjoyed paging through your sketchbooks via the blog posts. I especially enjoy the days where you’ve included the “real life” photo along side.
January 15th, 2007 at 5:04 am
Your site is wonderful. Your drawings are inspiring for me. I haven’t been sketching much as the weather here in Connecticut has been rainy. Now, I want to get back to it.
Thank you for the idea to refill my Bijou box. I’ve been searching for refills with no success. Your solution is big help. It’s a great little box, isn’t it.
Regards,
Kate
January 14th, 2007 at 7:12 am
I feel like its Christmas in January! Thank you so much for your BEAUTIFUL and clear instructions. What a lovely gift!!!!!!!!!!!
January 13th, 2007 at 8:38 pm
How awesome. Thank you so much for your detailed instruction’s. This must have been time consuming to type and photograph. I’ll put the at the top of my “to do” list.