All Posts On: Projects

Altered Swag   August 24th, 2008

   DIY Customized Messenger Bag: a tutorial of sorts

Anyone attending a conference these days is expected to take possession of, and tote around, a sizable load of low-quality bag/shirt/cup/pen/toy trinkets. An odd custom – most swag is destined for the landfill in short order – but ubiquitous none the less.

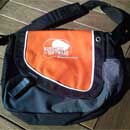
Last year I received a conference bag that actually got my notice. As to be expected it is poorly made and lacking in features, but I rather like the square-ish shape and rakish flap.

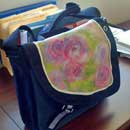
customized_messenger_bag
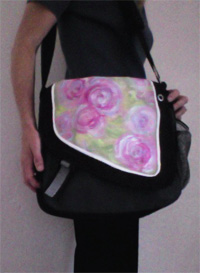
Finished Bag (larger)

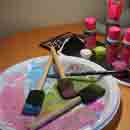
Right off I envisioned the bag with swirly cabbage roses on the flap. I have no idea why that particular vision came to mind, but inspired I was. So off I went to the local mega-craft store to get a bunch of inexpensive fabric paints: spray-able white, matte pink/fuchsia/blue, and silver metallic.

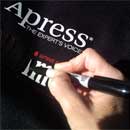
I started with a Sharpie permanent marker to black out the white advertising text on the back of the bag. This worked remarkably well: you can still see the writing if you look closely, but it’s well camouflaged.

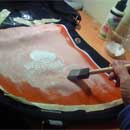
Covering up the bright orange background on the front flap was more of a challenge. I used the spray-able white paint which has a whitewash consistency and applied it with a foam brush. After five separate coats the orange was barely visible.

Next, I put the bag on a shelf and forgot about for many months. Suddenly this week I got the urge to finish it.

Painting

The image on the flap took about two hours to paint. The paints blend and mix easily and dry quickly with a nice matte finish. I did most of the painting with a foam brush, but also used my fingers to push paint around and soften edges.

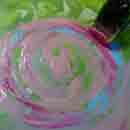
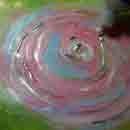
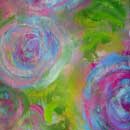
First I put down a layer of sage green paint in vaguely leafy shapes. Then I laid out the flowers with swirls of light pink, followed by dark pink, light blue, and around the colors again until I liked the result. I finished up the background by applying the green paint in more specific foliage shapes, using the lighter green to suggest highlights and edges.

Lines of metallic paint made for interesting texture on the flowers but looked a bit stark to me. I went back in with the flower colors on my fingers to soften the silver lines here and there: that did the trick. Finally, I took a look at the image as a whole and added blobs of color where I thought it would help with balance or light.

The piping around the painted area was white to begin with but i had to use heavier white fabric paint and a real paintbrush to cover splotches and restate the white. Then the black sharpie came out one more time to cover some paint that had found it’s way onto the black canvas.

Voilà! The next day I was able to use my new bag. I am quite pleased with the result, I must say. I do wish the bag itself were a bit sturdier, but for now it works nicely.

What’s Next?

Now that I have this project done, it is time to customize a better bag. Any canvas bag should take the paint well, although Timbuk2 and Case Logic make bags specifically for personalizing.

Have some conference swag lying around? Bags or T-Shirts perhaps? Consider using it to experiment with. The design needn’t be elaborate: a border of dots or swirls or a small image would be enough to make it one-of-a-kind. What have you got to lose?

❀   ❀   ❀

Moleskine Exchange: Favorite Things   July 29th, 2008

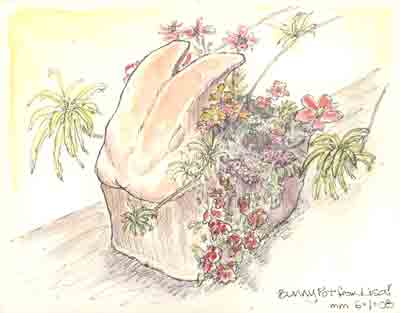
sketch_flower_pot
The First Sketch (larger)

Inspired by the ongoing Moleskine Exchange projects, Lisa and I decided to do one of our own. She moved away recently, but this is a way we can still sketch together – remotely!

We used the same pocket-sized Japanese-style folding book, but I rebound it with HP (hot press) watercolor paper, as is my preference with the regular books.

We are going to send the book back and forth between us, and when it’s done we’ll scan it and construct a copy so we each can have one. There are no rules: we can do whatever we want – no pressure! – and take as long as we like.

We do have a general theme though: Favorite Things. I started the book off by sketching a flower pot that Lisa gave me before she left. I have four rabbits, so this shape is quite appropriate! This is the same pot that I sketched recently with a few others on the porch.

Lisa has posted about our exchange on her blog, and has now added something to the book for me. I can’t wait to see it!

?        ?        ?

sketch_cottage

I have been negligent in recognizing the kind ackowledgement from no less than three of my fellow sketchbloggers: the Brillante webblog award. I must really deserve this 🙂 These folks are all inspiring: check out their wonderful blogs and see for yourself!

The tradition is that I now nominate some other blogs, but this award has made quite the rounds. So, I will instead recommend a visit to any of the wonderful art blogs listed in the Places to Visit section, just to the right side of this page.

❀   ❀   ❀

Leah’s Moly   July 6th, 2008

moly_x_exchange
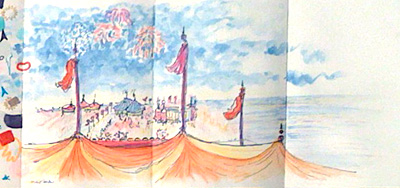
Leah’s Moly So Far (larger)

It’s time for another round of the International Moleskine Exchange. This month I got to work in Leah’s moly. Her theme is “Enter the Carnival”. Great idea: this was sure fun to do.

This time I used an Ultra Fine Sharpie for the drawing, rather than my usual fountain pen, and the same watercolor pencils that I’ve been using, for color.

sketch_circus_tent
My Addition (larger)

More Entries in this Project:
     My Moly_x Drawings

For More Online Information:
     Moly_x Explained [requires Flickr login]
     Moly_x Image Pool
     Moly_x_20 Project Blog

❀   ❀   ❀

Lee’s Moly   June 1st, 2008

sketch_demo
Sketch in Progress (larger)

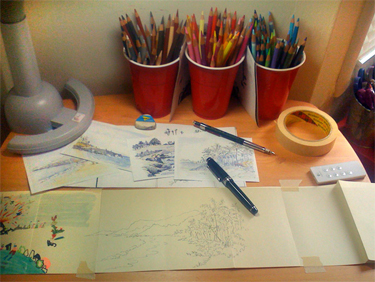
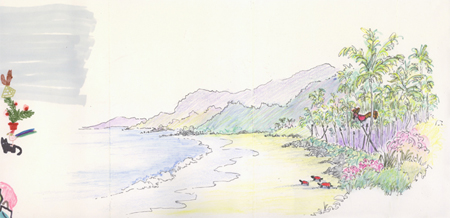
I just completed my International Moleskine Exchange contribution for this month. I am in group 20 (aka moly_x_20) and got to work in Lee’s Moly this time around. His Hawaii idea intrigued me, so I decided to keep with that and printed out some of my previous beach sketches for reference. I included some little critters too, to tie into Lee’s playful theme.

I’ve been experimenting a bit with how to best add color to this paper. Last time I used watercolor pencils, but this time I combined those with regular Prismacolor colored pencils of which I have many. I think I prefer the results with watercolor pencils alone: I’ll go back to that next time.

sketch_beach
All Done (larger)
moly_x_sketchbook
The Book So Far (larger)

Update:
Lisa (rightside) has done the next entry in this book.
Check it out!

More Entries in this Project:
     My Moly_x Drawings

For More Online Information:
     Moly_x Explained [requires Flickr login]
     Moly_x Image Pool
     Moly_x_20 Project Blog

❀   ❀   ❀

International Moleskine Exchange   May 27th, 2008

   The Moly_x_20 Project

sketch_vineyard
moly_x_20 Book, Napa Sketch (larger)

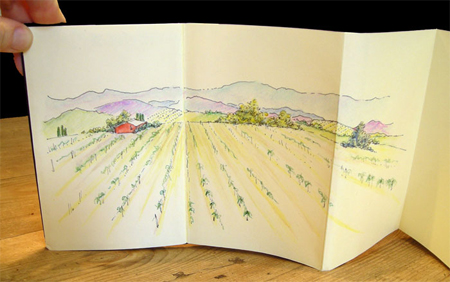
This is my first contribution to the popular International Moleskine Exchange (aka moly_x) mail-based art exchange project. The idea is that artists work in small groups filling accordion-style Pocket Moleskine notebooks that are mailed, round robin fashion, around the group. Thus far there are 29 groups formed: I am in group 20 (aka moly_x_20). Each group has an individual blog to track partipation and communications, and all projects post images to the unified Flickr group: a great place to monitor the progress of the project at large.

For my own book I decided to do a variation of a sketch I did recently in Napa. I’d never really reprised a sketch before but found it a lot of fun to figure out what to change and add to make it work in the new format. The paper in these Moleskine books has a waxy finish which is resistant to watercolors (which is why I rebind Moleskines for my own use), so I also had to do some experimentation to find a similar way to add color.

I discovered that watercolor pencils work fairly well in both wet and dry form. The pencils I used are Caran d’Ache Supracolor II, of which I happened to have a few assorted colors on hand. I think it’s time to go out and round out my collection of colors, in anticipation of this project!

Update:
Lisa (rightside) has done a beautiful next entry in my book.
Check it out!

More Entries in this Project:
     My Moly_x Drawings

For More Online Information:
     Moly_x Explained [requires Flickr login]
     Moly_x Image Pool
     Moly_x_20 Project Blog

❀   ❀   ❀

Project: Sketch Calendar 2008   January 13th, 2008

sketch-calendar-cover
Sketch Calendar Cover (larger)

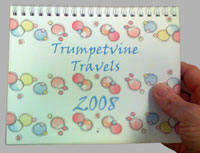
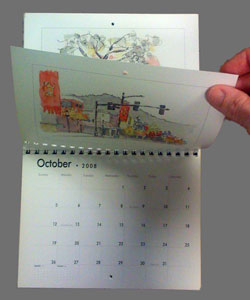
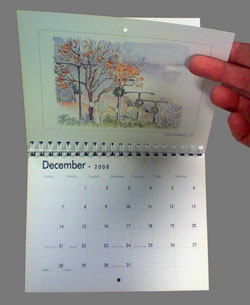
This holiday I just didn’t feel like shopping so decided to make gifts: one something that would work for everyone. I toyed with numerous ideas but settled on a calendar.

I started late and didn’t have time to produce the whole calendar myself so decided to have them printed online. There are many services that will make custom calendars for you (Shutterfly, Snapfish, etc.) but those calendars are full-sized: 8.5 x 11 inches, closed. I envisioned something smaller. Ultimately I found Zazzle who offer a 7 x 5.5 inch (closed) calendar for under $20 each.

sketch-calendar-spread
Sketch Calendar (larger)

I choose twelve sketches from my travel sketchbooks and set to work on the website. Unfortunately, the Zazzle facility for customizing calendars is sorely lacking: inadequate to the task and very buggy. My dogged determination did not serve me well: I should have given up and tried something else but instead slogged through, learning the bugs and carefully working around them. Photoshop helped too: the Zazzle tools for adding borders and lettering don’t work so I added those elements directly into my image.

sketch-calendar-spread
Sketch Calendar (larger)

Despite the ordeal the results are quite nice. There are a couple of small problems (the spine is too small for the depth of the hole punches and sloppy cutting left crop marks on most pages), but the paper quality and printing are both excellent.

The calendars were well received, and I am glad I decided to make my gifts. Sadly, I can not recommend Zazzle right now but hopefully by next year their tools will improve.

I do recommend using your sketches as calendar content though. Sketches don’t have to be fancy to make a charming calendar and it’s fun to plan out the project and see the results.

For those of you who are curious, I have scanned all of the calendar spreads and you can take a look:

2008 Sketch Calendar Pages

Update: I have had several requests to purchase this calendar. In fact you can, directly from Zazzle:

   http://www.zazzle.com/trumpetvine

Right now it seems to be $17.95 plus shipping. I am not seeking to make any money on this, nor will I, but you’re welcome to order one if you like.

❀   ❀   ❀

Holiday Card 2007   December 25th, 2007

sketch_fountain-berkeley-arlington
Arlington Fountain,
Crop for Card
(larger)
sketch_fountain-berkeley-arlington
Arlington Fountain,
Original Sketch
(larger)

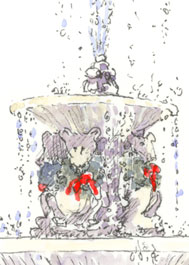
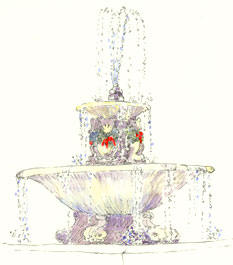
This year for our holiday cards I made a sketch of my favorite fountain all decked out for the holidays. Arlington Fountain sits in the center of the Marin traffic circle, here in Berkeley, and is a reproduction of the fountain that stood there from 1911 through the 1950’s.

The sketch seemed a bit stark to me though (maybe needs a bit of background?), so decided to try an extremely cropped version of it for some of the cards. I like the result! I had the cards made at Shutterfly, who did a fine job just like they did on my cards last year and on my foodie note cards.

Happy Holidays Everyone!

Related:
  Other Projects
  Arlington Fountain SketchCrawl

❀   ❀   ❀

Making Connections: Blog Business Cards   June 20th, 2007

business_card_design
Final Design (larger)

Often when I am out and about sketching I run into people who are curious and would like to know more. I give them my URL, but of course they soon forget. So, I decided to make up a “business” card that I could give out. It has proven very useful, both for random encounters and to give to fellow SketchCrawlers.

This turned out to be a really fun project. I ordered the cards online (from Overnight Prints, although there are many companies that do this). They provide a template file (.pst) that can be manipulated in Photoshop Elements. I spent about two hours designing the front of the card, and about a week agonizing over the exact right color of blue for the back!

There are many production options for the cards themselves. I choose heavy card stock with a glossy finish on the front which looks great. On the back is a matte finish: perfect for writing notes.

❀   ❀   ❀

Rebinding a Moleskine Notebook   January 13th, 2007

handmade sketchbook

With rare exceptions, I do all of my sketching these days in a Pocket Size Moleskine (outdated planner) notebook rebound with my own paper. I have created quite a few of these journal sketchbooks and have honed my binding technique along the way. There has been lot of interest in how I do this project/moleskine hack, and so I have written up the instructions for “Moleskine Reloaded”.

Get Them Here

The bookblock is sewn together with a form of Coptic binding, which opens flat and complements the Moleskine very well. This binding method can also be used to produce books with exposed spines, as the stitching is plenty durable and quite attractive. I hope that these instructions are useful, and perhaps inspire some ideas for related projects.

❀   ❀   ❀

Moleskine Reloaded   January 12th, 2007

…or, How to Rebind a Moleskine Notebook :
                           Make a Custom DIY Sketchbook!

Table of Contents

I. Introduction VI. Punching   sketchbook_journals
II. Stuff VII. Sewing
III. Decisions VIII. Ripping
IV. Cutting IX. Gluing
V. Folding X. Finishing

I. Introduction

The size and durability of the Moleskine Pocket notebook is perfect for my sketching needs, but the paper is not ideal. Although both “sketchbook” and “watercolor” versions are available, neither is well-suited to my particular requirements. And so, I have developed a process for replacing the paper (aka Moleskine Reloaded) while retaining all the other wonderful attributes of the Moleskine.

These instructions describe exactly how I do this process, but one can of course vary the project extensively to suit other notebook sizes, papers, or covers. The pages themselves are sewn together with a Coptic style binding. If you have never sewn a book before, don’t be scared off by this proposition. It is not as hard as it looks, really, and it’s a lot of fun. (more…)

❀   ❀   ❀

Sushi & Tapas Note Cards   January 5th, 2007

sketch_note_cards
Custom Cards (larger)

After my recent success with holiday cards, I decided to order some smaller note cards from Shutterfly featuring food sketches I did recently in local Berkeley restaurants. The tapas sketch was made at Bar César, and the sushi at Miyuki. I am very pleased with the results!

These cards are smaller, 3.5 x 5.0 inches, and just big enough to send in the mail. The production on these is not as fancy as on their holiday cards, but they are quite nice none the less and these will be very useful.

❀   ❀   ❀

My Handbound Journals   December 21st, 2006

sketchbooks-moleskine

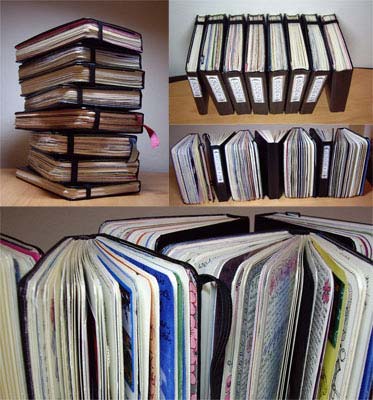
For the past three years I have been keeping my sketchbook journals in pocket-sized Moleskine Daily Planners that I rebind with 90lb hot press watercolor paper. After having tried seemingly every other option I hit upon this formula as being just right for me.

I completed three volumes last year, and am well into my fourth volume for 2006. I am rushing to fill it up so that I can start a fresh book on the first of the year. I also will be needing to bind the next book soon. It’s a ritual of sorts that I have come to look forward too, and having done it so many times it now comes easily.

❀   ❀   ❀